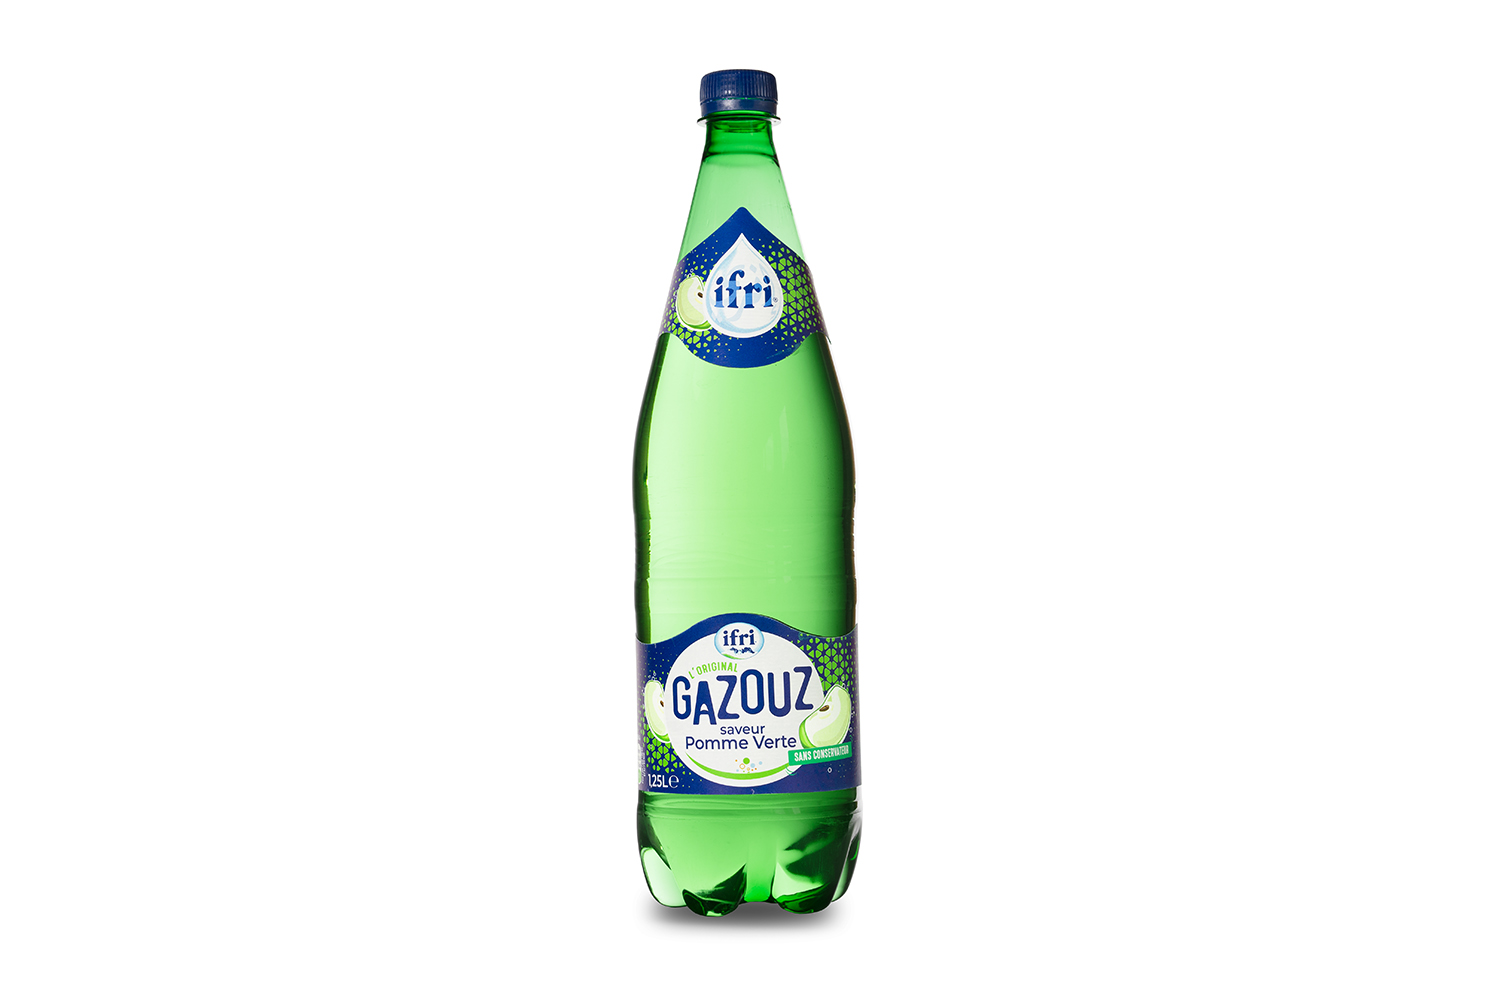
Photographing a transparent bottle(packshot) is no mean feat. Firstly, because of unwanted reflections; but also because if the liquid contained is also transparent, the ideal is to be able to reproduce its texture in the image. Yet there are simple solutions, even with just one light. In this article, we present one of them.
What are the constraints?
To begin with, we need to understand what the constraints are. The first is the transparency of the liquid contained, since it has to be transcribed. To give this impression, we need the rays of a light source to come to us as they pass through the bottle. It’s exactly like looking at the contents of a bottle and placing it in front of the sun: the liquid appears clearer and more transparent. The second constraint is to avoid reflections on our bottle, which are often unsightly, although they can also be harmonized. Unfortunately, these reflections are often unavoidable when shooting, so we’ll have to find a way to get rid of them in other ways.
Which installation? What equipment?
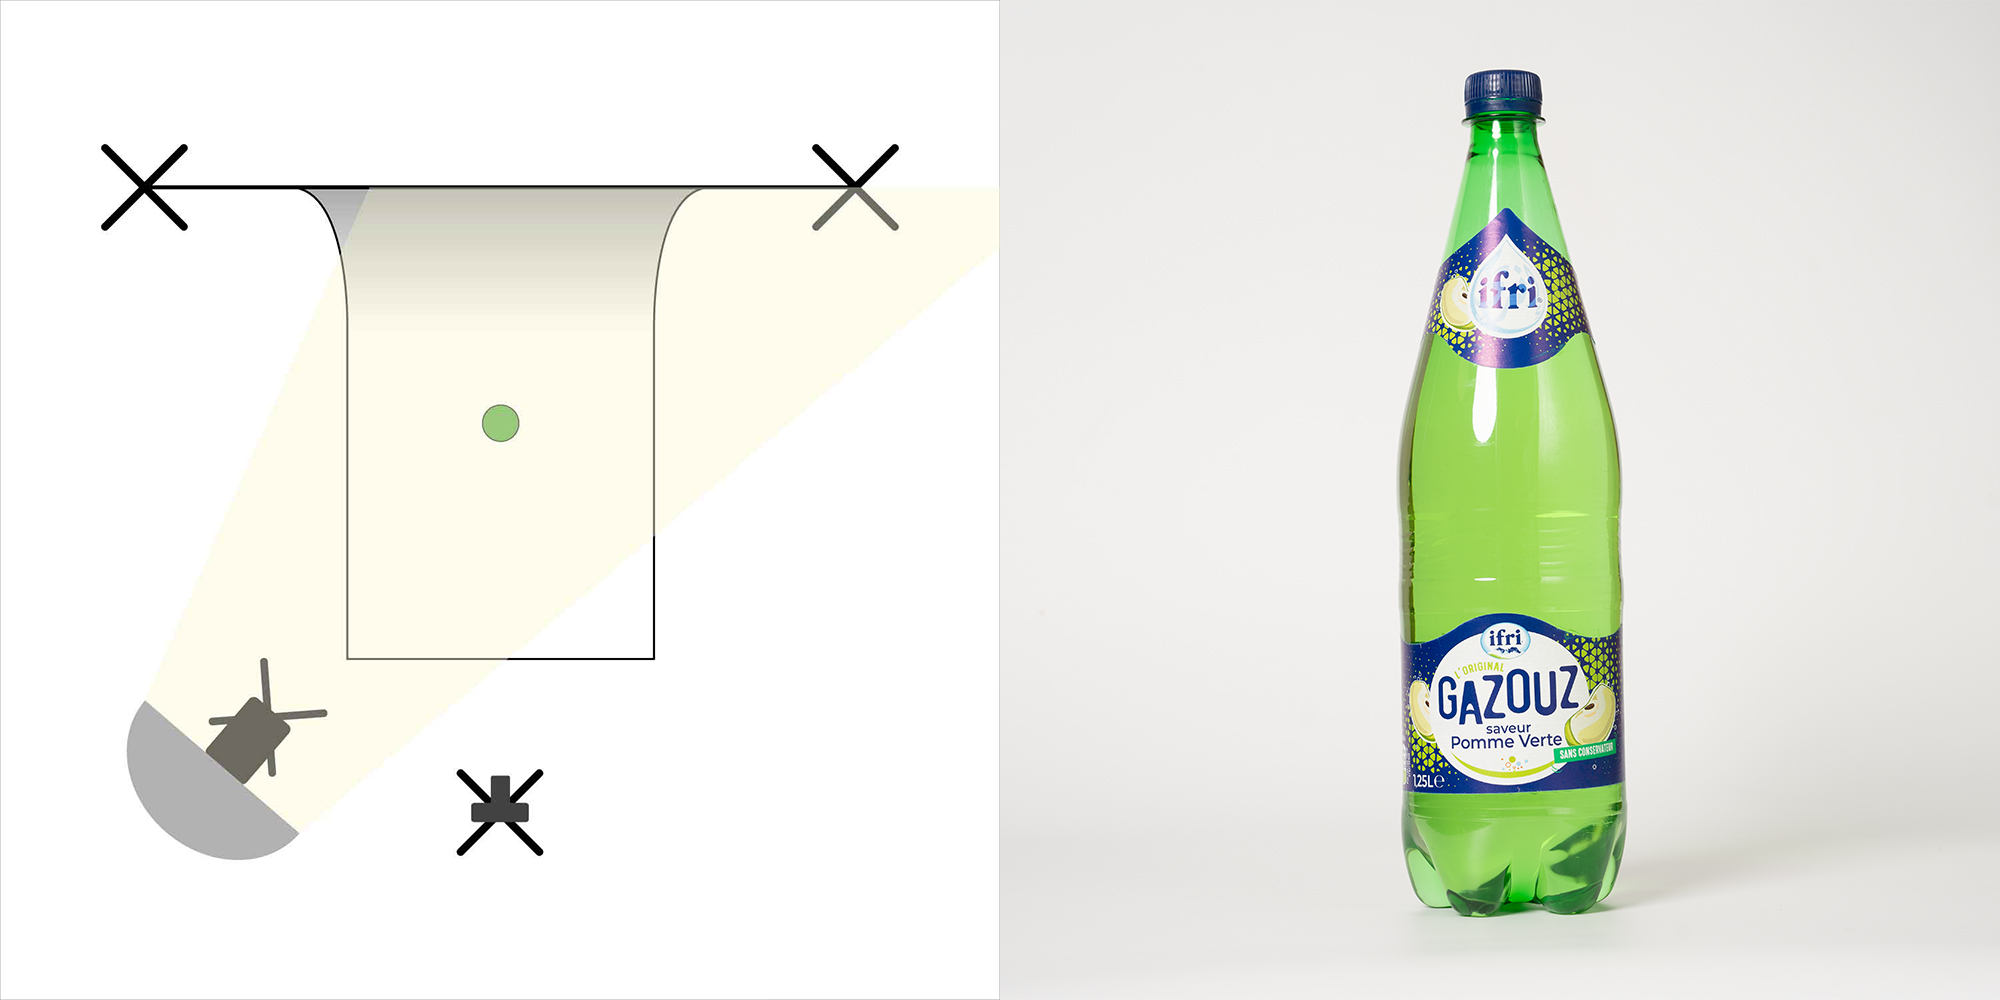
Ideally, place the bottle on a table at a convenient height. For background and support, we recommend a reflective white background arranged in a cyclorama. Position your tripod precisely opposite the bottle, and raise your camera body halfway up the bottle to limit perspective distortion.
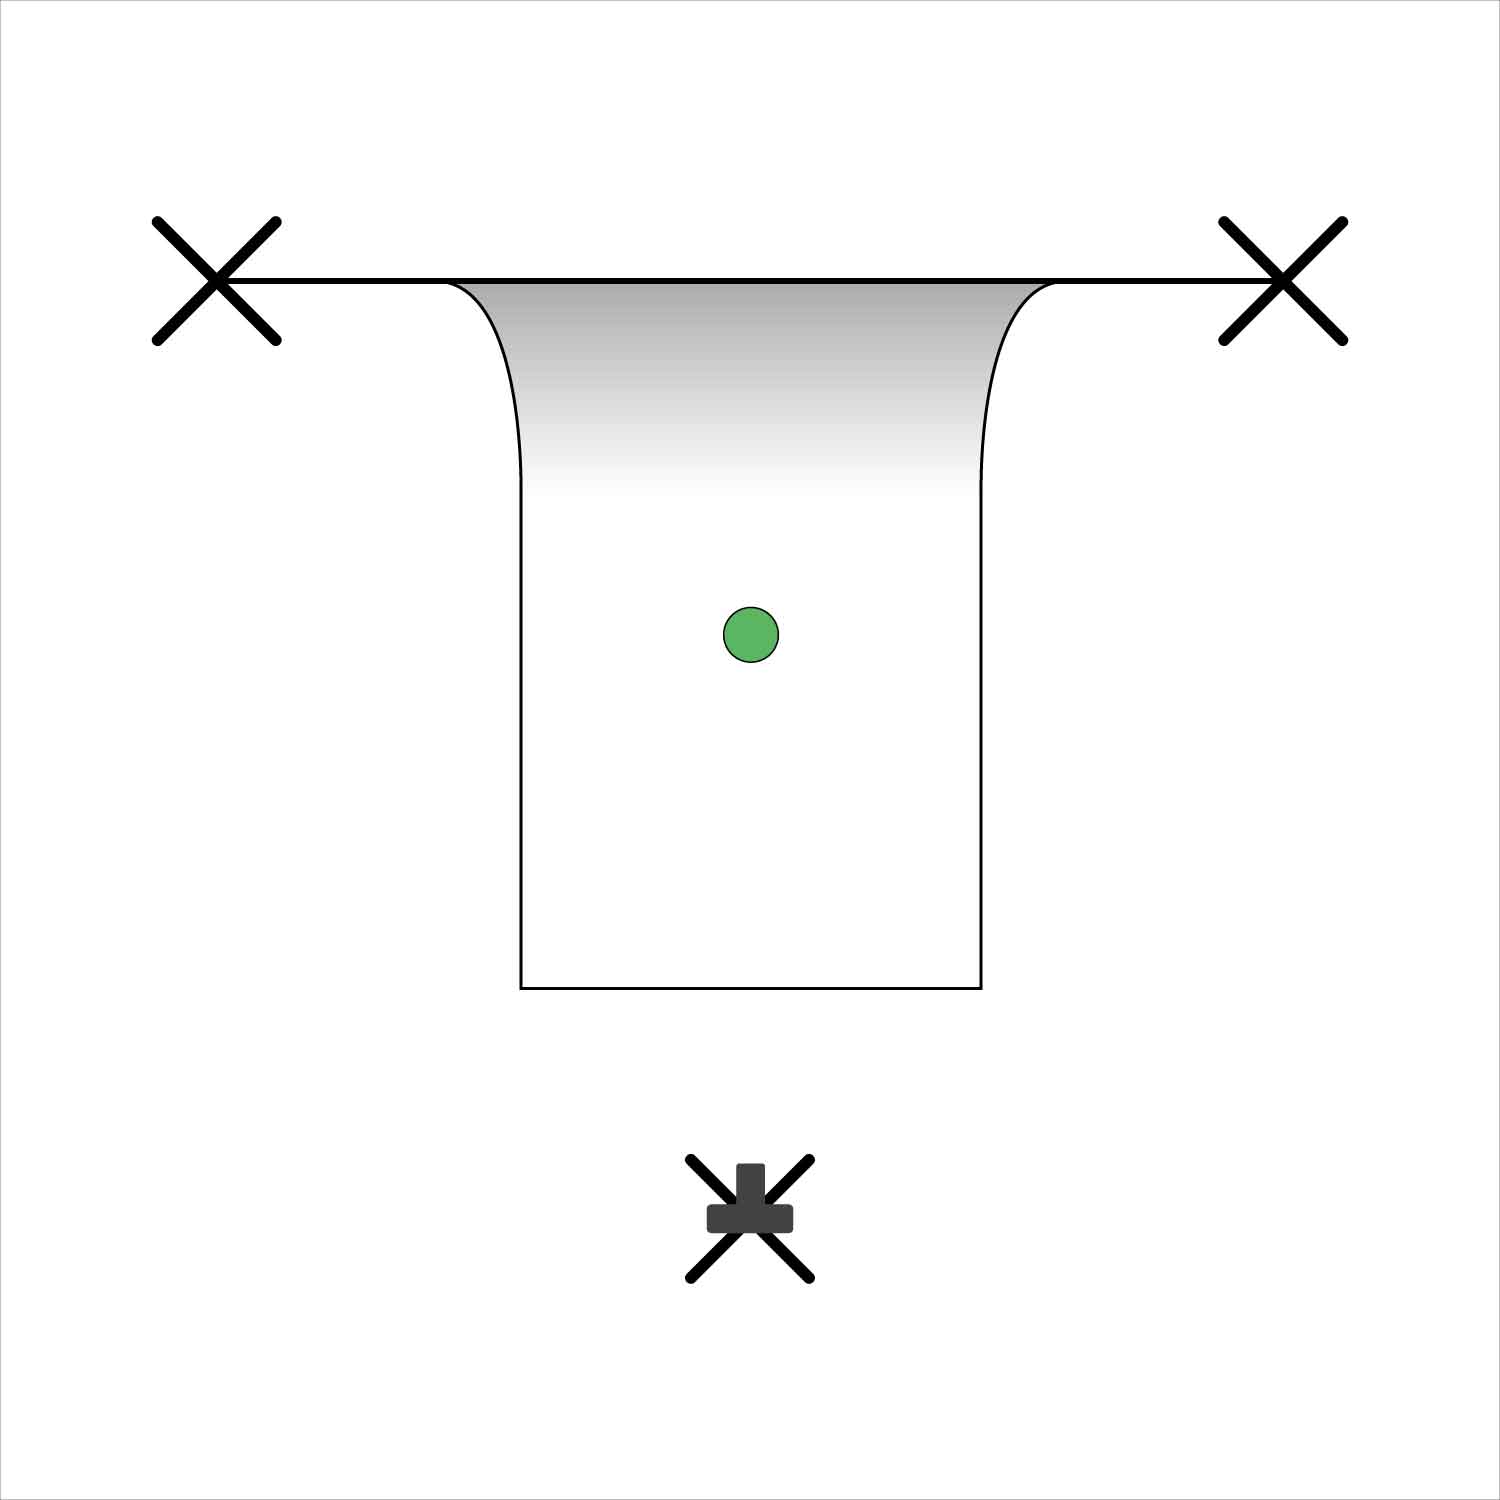
For lighting, a single source is sufficient. Flash or continuous light? Both can work. We’ll combine this source with a beauty bowl and then an umbrella or softbox.
Photo N°1: First, we’ll use a beauty bowl for indirect lighting, reflecting off the background. Place it at about the same height as the bottle, to the right or left of the table, and aim it so that it illuminates as much of the bottom of the bottle as possible. To eliminate any risk of reflection, you can also use a black barn door between the product and the lighting. Shoot your first image in this way, which will be used to render the liquid.
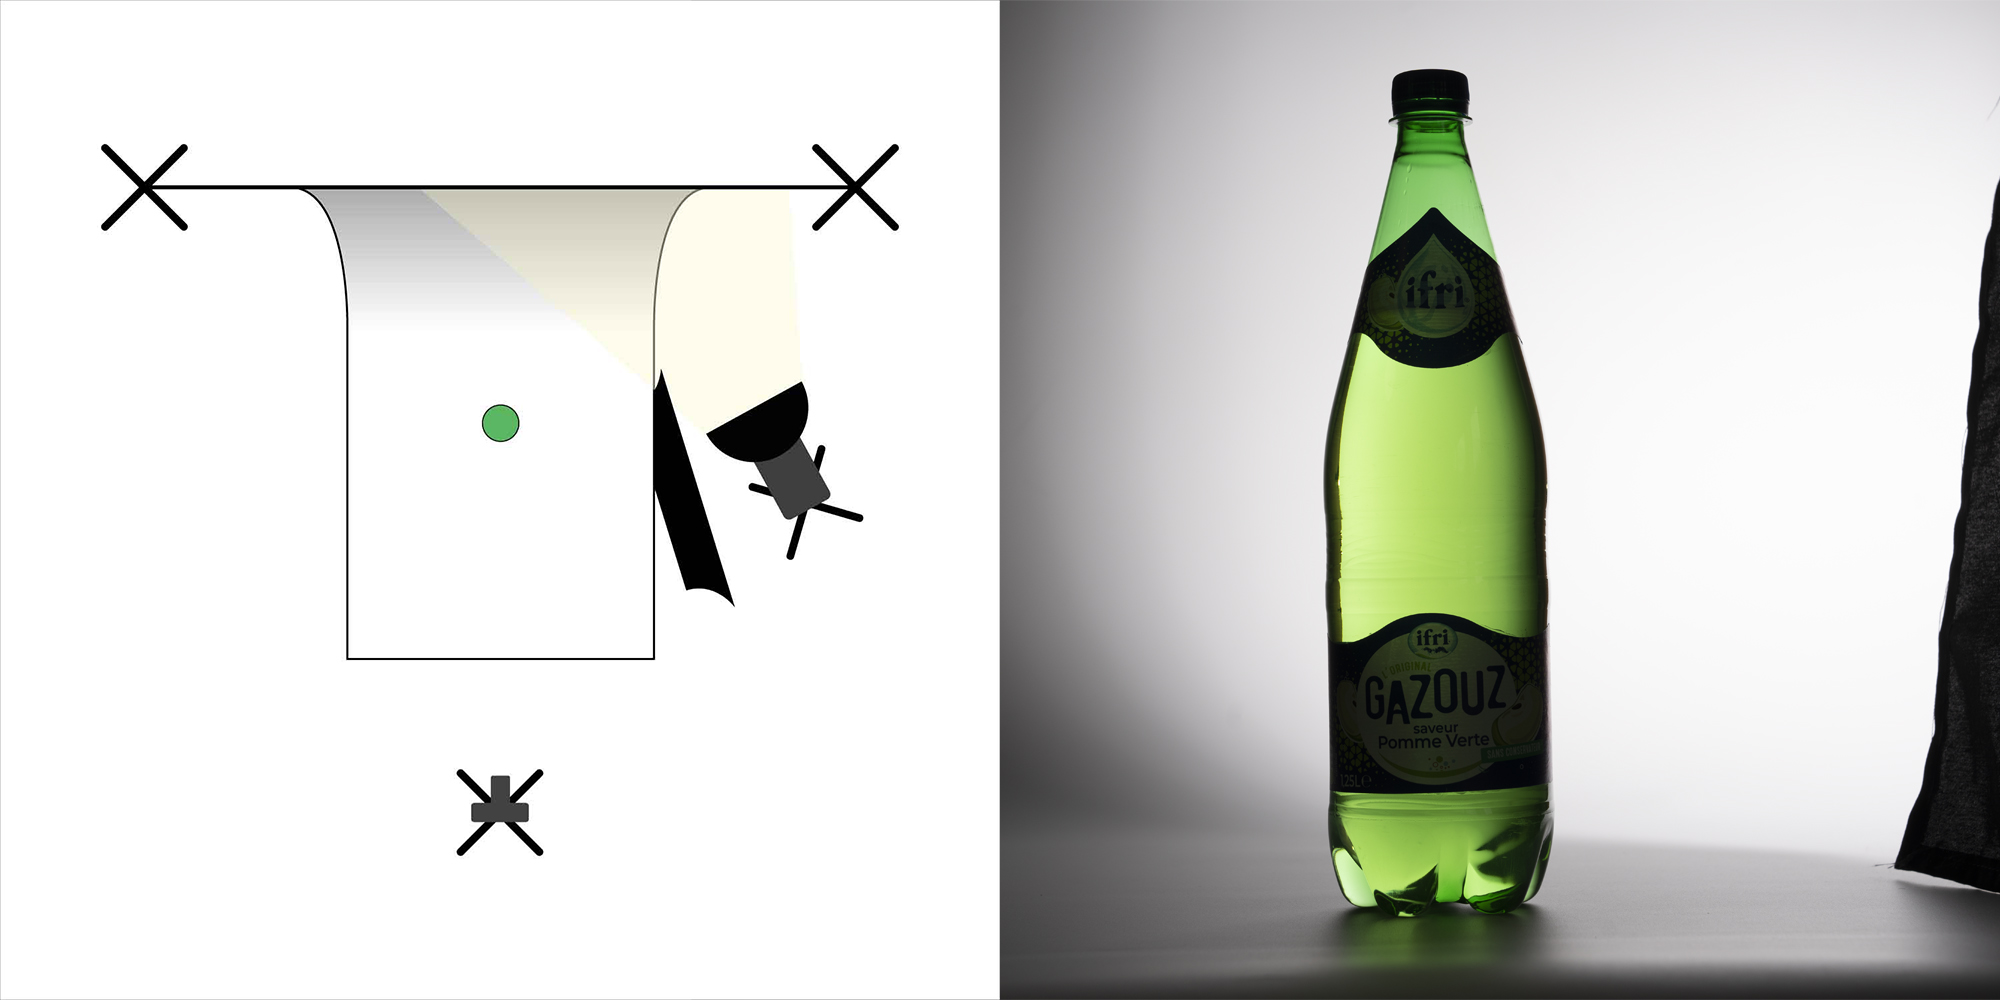
Photo N°2: Without touching the housing, change the position of your light source. Move it away from the bottle and replace the beauty bowl with more diffused lighting such as an umbrella or softbox. The idea now is to play with the height of this source to “place” the reflection in a less disturbing area on the product. In our case, the bottle had 2 labels. So we took a glare-free photo of the top label and a glare-free photo of the bottom label. It’s up to you.
Post-production :
Assemble your images in Photoshop using layer masks, keeping only the part of each photo that interests you (label 1, label 2, transparency, etc.).
Finally, you can position a white background in the background, create a drop shadow under the bottle or eliminate the product’s few defects.
